Upload a completed response
Upload an application you already filled out as a PDF, Word, or Excel file so its answers are read into a response you can search, link, and reuse.
Before you start
- You need access to the Responses area of the portal.
- Have the completed file ready: PDF, Word (.docx), or a spreadsheet (.xlsx, .xls, .csv, .ods), each under 25MB. Legacy .doc files aren't supported — save the file as .docx first.
- This is for applications your own account filled out and sent somewhere else. If an applicant returned a completed copy of one of your forms, use Upload a response against an existing form instead.
- Fillable PDFs and spreadsheets are read exactly. Flat PDFs and Word documents are read by AI, so plan to check the answers once the upload finishes.
Steps
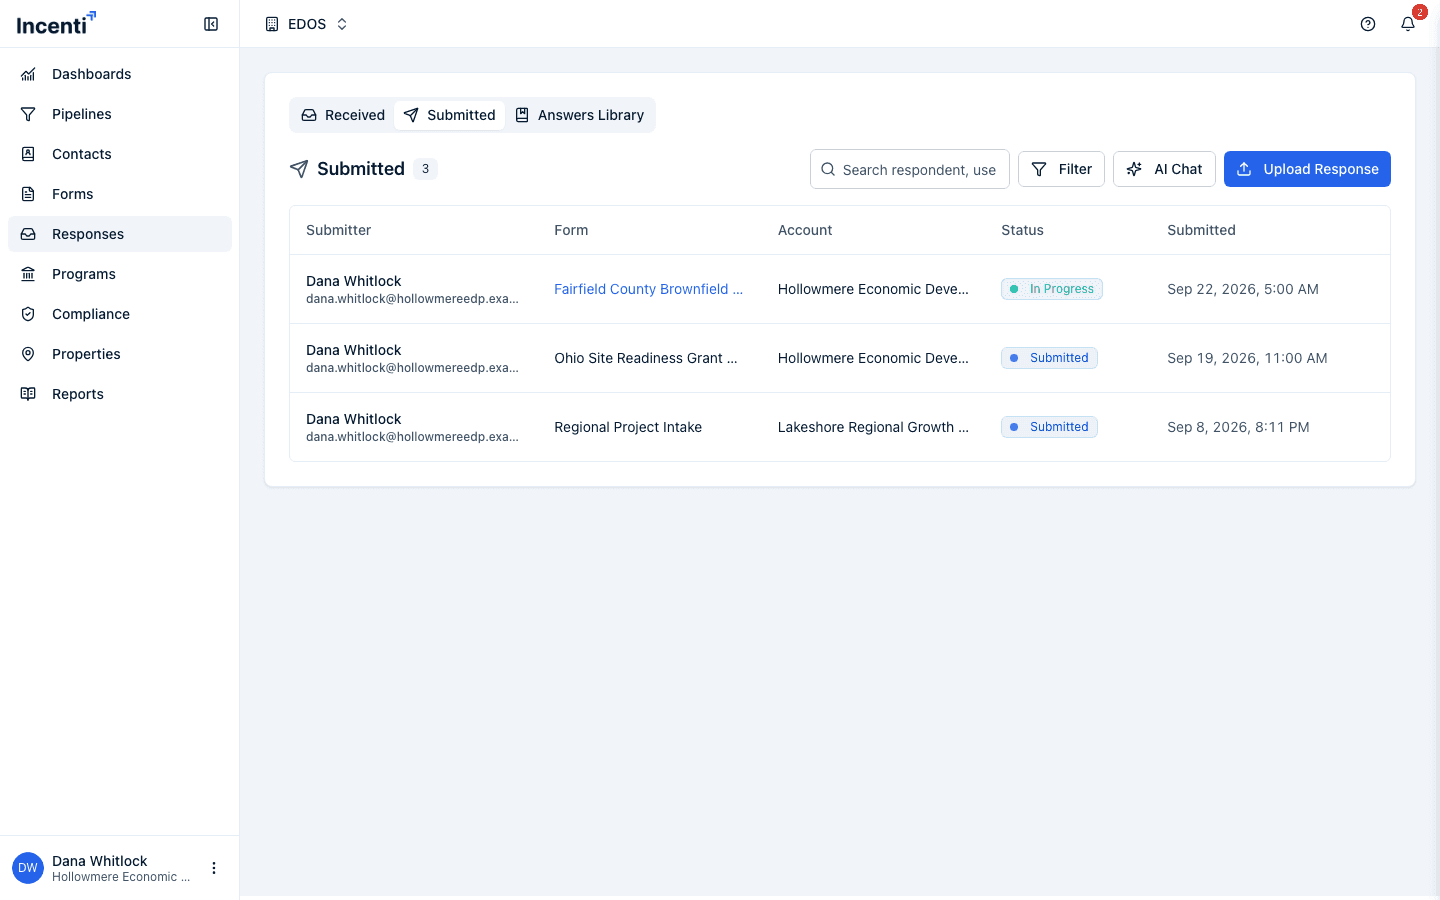
- On the responses list, open the Submitted tab and click Upload Response.
- In the Upload Response dialog, drag and drop one or more files onto the upload area, or click Choose files to browse. Each file becomes its own response.
- Once a file is listed, an Already sent? choice appears. Pick Not yet — mark it Ready for Submission or Yes, it's already been sent — mark it Submitted.
- Click Upload response (or Upload N responses when you picked several).
- Wait while each file shows Reading your answers... — a minute or two per file. You can close the dialog; it says "each response will appear in the list when it's ready."
- When a file finishes, click Review response to open it in the workspace.
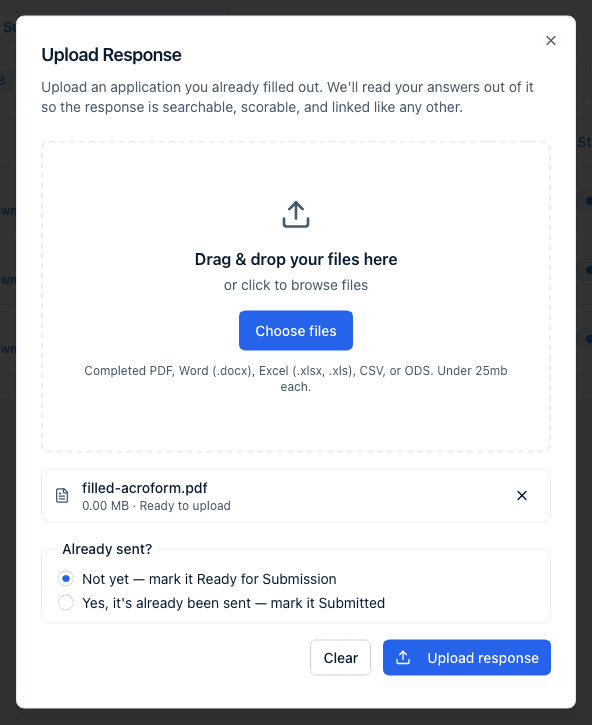
The dialog explains itself as "Upload an application you already filled out. We'll read your answers out of it so the response is searchable, scorable, and linked like any other." When every file is done it reads "All done. Each response is in your list too." If one failed, the summary counts how many succeeded and says failed files can be uploaded again.
Check the answers
The response opens in the workspace with the answers we read shown in the Response card. A banner at the top says how many answers were read — "We read 8 answers from your document" — and offers Save reusable answers; see Answers Library.
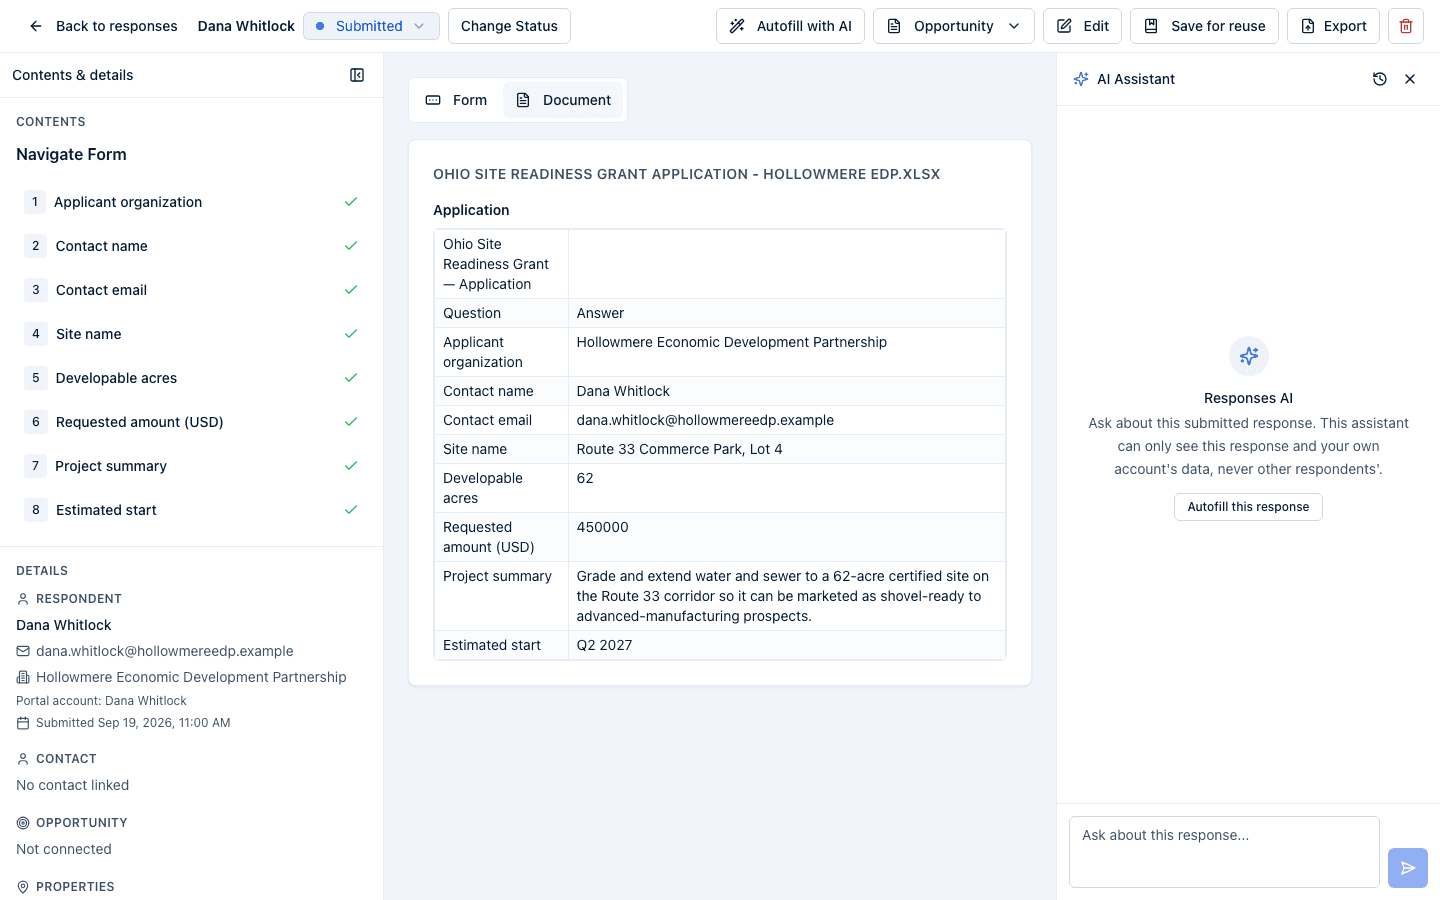
- Switch the middle of the page between Form and Document with the toggle above the answers. Document shows the file you uploaded: a PDF renders as a PDF, a Word file as its text, and a spreadsheet as a table (large sheets show "Showing the first rows and columns of this sheet."). Form is the default and is where you edit.
- Every answer read from the file is marked as coming from the document. Turn on Show sources above the answers to see that provenance, or open Details in the left rail, where the original file sits under Documents as "Original upload".
- If something was missed or misread, click Edit, fix it, and Save changes.
- Use the Opportunity dropdown and the Details rail to connect the response to an opportunity, contact, or property, exactly as for any response — see Review a response.
What happens next
- Reading a file is a background job. The dialog and the responses list update when it finishes; nothing is emailed.
- The response is stored as Ready for Submission or Submitted, depending on your Already sent? choice, and appears in your Submitted tab. There is no filled copy to generate — the file you uploaded is the completed document, so Export offers it as the original.
- Answers read from the document carry "document extraction" as their source, which the AI chat and the Show sources toggle both report.
- Like other responses you create from your own documents, no contacts, organizations, or properties are created from it and it is never scored. It is private to your account.
Common questions
Q: What's the difference between Create Response and Upload Response? A: Create Response (Received tab) takes a blank document, turns it into a form for you to fill in, and writes your answers back into the file. Upload Response (Submitted tab) takes a document you already completed and reads the answers out of it.
Q: Can I upload more than one file at once? A: Yes. Drop as many as you like into the Upload Response dialog; each becomes its own response with its own progress line, and a failed file can be dropped in again without affecting the others.
Q: Some answers are wrong or missing. Why? A: Fillable PDF fields and spreadsheet cells are read exactly. Flat PDFs and Word files are read by AI from the text, which can miss or mislabel a value. Click Edit, correct the answer, and Save changes — the correction is marked as manually edited.
Q: Where is the filled-in copy of my document? A: There isn't a separate one. The file you uploaded is already complete, so it is the document on the response. Open Details → Documents or use Export to download it.
Q: Can I upload an applicant's returned copy of my own form here? A: Use the Received tab for that — Create Response, then A completed copy of one of my forms — so it joins that form's real responses and gets scored. See Upload a response against an existing form.
Related
Last updated on