Review a response
Open a response's detail page to read or edit its answers, change its status, connect it to an opportunity, download its documents, and export it.
Before you start
- You need a response to open — from the responses list, click any row.
- What you can do here depends on whether your account owns the form the response was submitted to (you'll see the full set of actions below) or your account submitted the response to someone else's form (status changes, opportunity linking, scoring, and CRM sync are hidden — those belong to the receiving account).
Steps
Read the response
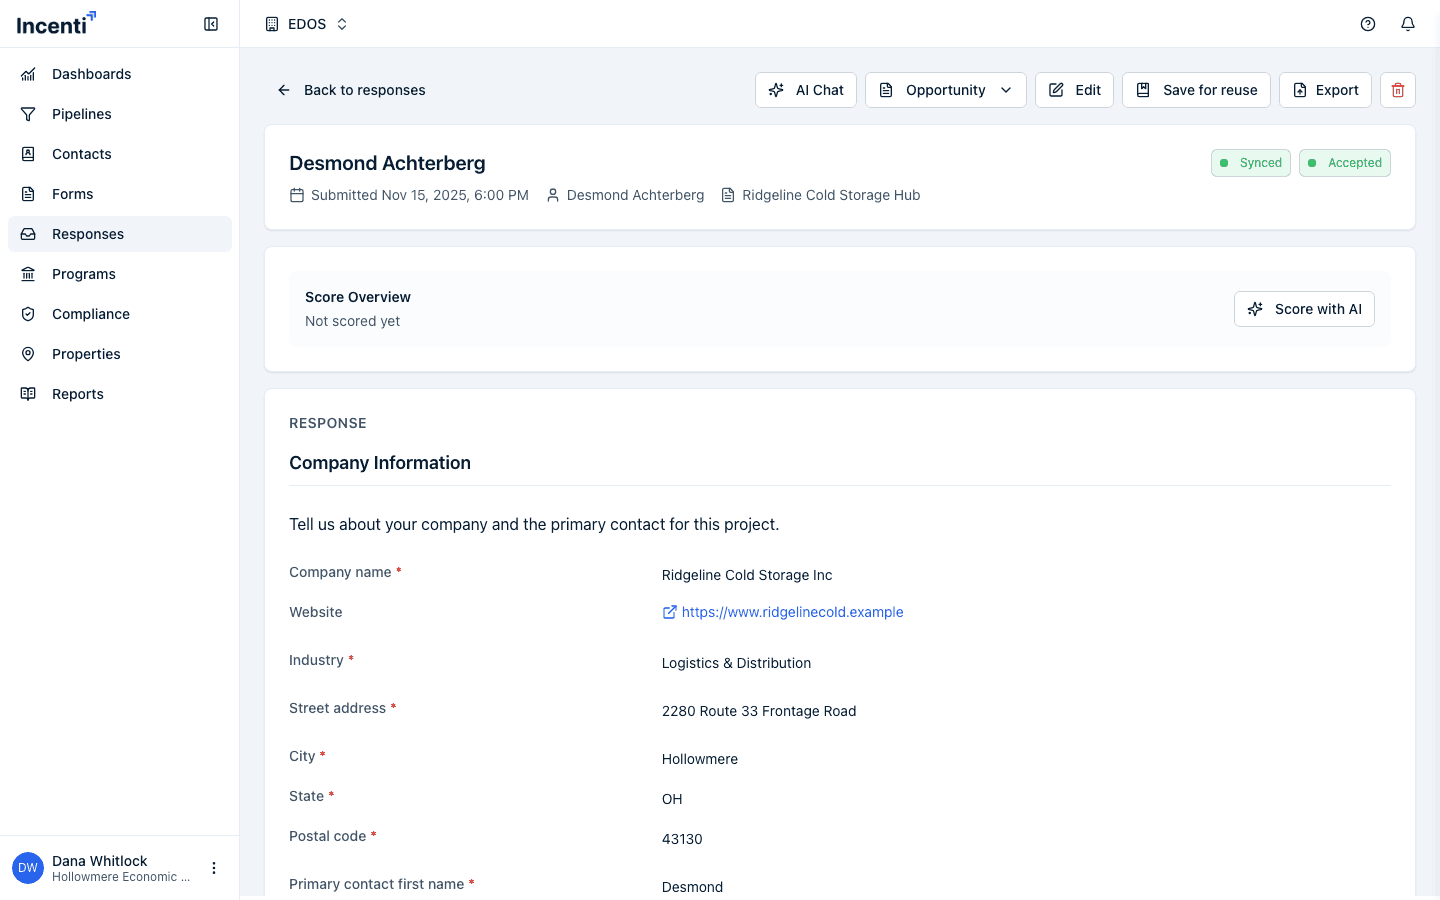
The detail page shows, at the top, the respondent's name, when it was submitted, the linked contact and opportunity (if any), and — for a response created from an uploaded document — the original document with a download icon beside it. To its right, the response's status is shown as a badge (or, for a document response you can still fill in, as a dropdown you can change directly).
Below that, if the response is connected to a property, a Property card shows its name, address, status, and acreage, with a map. If the form scores responses (or this one already has a score), a Score Overview section shows the percentage, the score breakdown by criterion, and any scoring notes.
The response's own answers are listed under Response. If any answers were filled in automatically, a Show sources toggle appears (only outside edit mode) so you can see where each one came from.
Edit the answers
Click Edit to make the answers editable, then Save changes (a confirmation dialog appears first) or Cancel to discard your changes. Both the account whose form this is and the account that submitted the response can edit; unrelated accounts cannot open the response at all.
For responses created from an uploaded document, each field in edit mode also offers a control to change the field's type, for when the type detected from the document came out wrong.
Download documents
For a response created from an uploaded document, the original file is shown (with a download icon) at the top of the page. A generated, filled-in copy of that document is reachable through Export once it exists (see below). Files a respondent uploaded into an Upload field appear as links inside that field's answer.
Connect the response to a project or contact
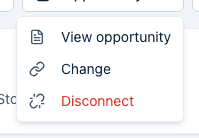
If your account owns the form, an Opportunity dropdown near the top of the page lets you Connect to opportunity (link to an existing one) or Promote to opportunity (create a new one from this response). Once connected, the same dropdown offers View opportunity, Change, or Disconnect. A linked opportunity also shows as a chip next to the submission date, which links straight to it.
A response's primary contact, when set, appears as a chip next to the submission date and links to that contact's page. A connected property, when set, is shown in its own card (see above) and links to the property page.
Export or print
Click Export to open the export dialog. For an ordinary response it offers CSV (spreadsheet format) and PDF (a formatted document for sharing or printing). For a response created from an uploaded document that already has a completed copy generated, Export offers only that Completed document — the filled-in original — instead of the generic CSV/PDF choices.
Change status
Click Change Status (only available to the receiving account, and only while the response is not already Approved or Declined) to open the Change Response Status dialog. Choose one of three actions: Accept Response, Shortlist Response, or Decline Response. Accepting can optionally Decline all other responses at the same time; each action can optionally Send approval/shortlisted/declined email notification to the respondent, and declining (directly, or as part of "decline others") lets you add an optional decline reason.
For a document-sourced response still in progress, there's no separate submit button — the status dropdown next to the badge lets the respondent move it through Pending, In progress, Ready for submission, and Submitted directly; the receiving account's Accept / Shortlist / Decline actions take over from there.
Save answers for reuse
Click Save for reuse to save selected answers from this response into your Answers Library, so they can be reused to fill other forms later.
What happens next
- Saving edited answers on a document-sourced response regenerates the filled copy of the original document in the background.
- Sending an approval, shortlisted, or decline email notification from the status dialog sends that email to the respondent; leaving the checkbox unchecked changes the status without emailing anyone.
- The Score Overview section's Score with AI button queues AI scoring for this response; the score appears on this page and in the list once scoring finishes.
Common questions
Q: Why can't I change this response's status? A: Change Status only shows for the account that owns the form, and only while the response hasn't already been marked Approved or Declined — those are treated as final.
Q: Will the respondent know I approved or declined their response? A: Only if you check the matching notification checkbox (Send approval email notification, Send shortlisted email notification, or Send declined email notification) in the Change Response Status dialog before confirming. Leaving it unchecked updates the status silently.
Q: I edited a response created from a document — do I need to re-upload anything? A: No. Saving your changes automatically regenerates the filled copy of the original document in the background; download the refreshed version from Export.
Related
Last updated on