Import and export properties
Download the import template, bulk-import properties from a CSV file or pasted JSON, review row-by-row results, and export every property on the account to CSV.
Before you start
- Anyone signed in on the account can import and export properties — there's no admin-only step for this.
- Import and export both work with the same set of columns: every field on a property (name, address, acreage, utilities, site details, and so on), one column per field. This is what makes an export re-import cleanly.
- A Client Property ID is what lets a re-import update existing properties instead of creating duplicates — see "How updates work" below before you re-import an edited export.
Steps
Open the Import Properties dialog
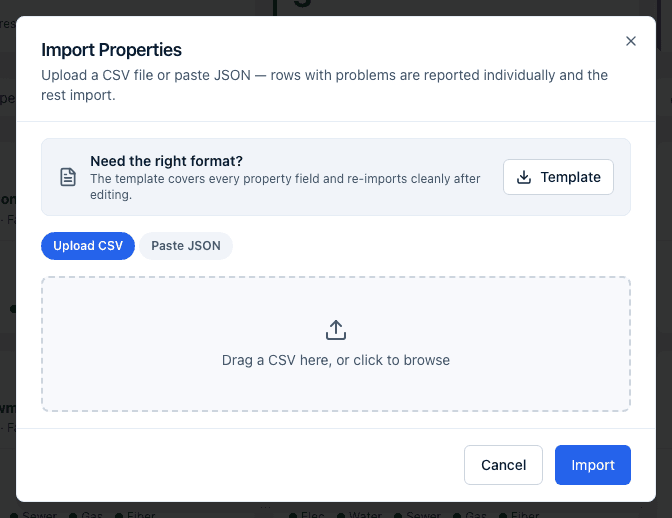
- From the properties page, click Import.
- In the Import Properties dialog, click Template to download
property-import-template.csv— a header row covering every property field, plus one filled-in sample row that imports cleanly on its own so you can see the expected format for numbers, yes/no values, and lists.
Upload a CSV
- With the Upload CSV tab selected, drag a CSV file onto the drop area
or click it to browse for one. Only
.csvfiles are accepted. - The file name appears once it's loaded. Nothing is sent to the server until you click Import.
Paste JSON instead
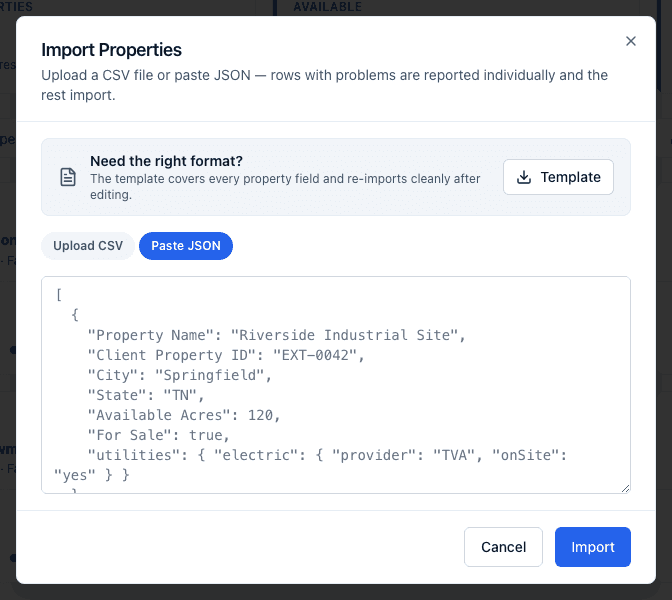
- Click the Paste JSON tab.
- Paste an array of objects. Each object's keys are the same field labels
used in the CSV template — for example
"Property Name","Client Property ID","City","Available Acres","For Sale"— and you can nest related keys in an object instead of flattening them, for example"utilities": { "electric": { "provider": "TVA", "onSite": "yes" } }. A single JSON object (not wrapped in an array) also works and is treated as one row.
Run the import
- Click Import.
- Every row is checked before anything is saved:
- Property Name is required on every row; a row missing it is reported as an error and nothing else on that row is saved.
- Yes/no fields (like For Sale, Floodplain, Electric On Site)
accept
yes/no,y/n,true/false, or1/0. - List fields (like Custom Badges) take several values in one cell
separated by a vertical bar, for example
Rail Served|Certified Site. (The Add New Property dialog uses commas for the same fields; the import uses the bar so that commas inside a value survive.) - Column headers are matched without regard to capitals, spaces, or
punctuation, so
property nameandProperty_Nameboth match Property Name. - Fields with a fixed set of values (like Status, Property Type,
Sale Price Unit) must match one of the allowed values — spacing and
dashes are tolerated (
site and buildingorsite-and-buildingboth matchSITE_AND_BUILDING), but anything else is rejected with a message listing the values that are accepted. - Number fields (like Sale Price, Available Acres) accept plain
numbers or numbers formatted with a leading
$and thousands commas ($1,500,000); anything else is rejected as not a number. - Leaving a cell blank is fine — it just means that field isn't set (or, on a row that updates an existing property, that field is cleared; see below).
- If the same Client Property ID appears on more than one row in the file, only the first occurrence is kept — the later rows are reported as errors and aren't imported.
- Rows with a problem are skipped; every other row in the file is still imported. You'll never lose a whole file over one bad row.
Read the results
After clicking Import, the dialog shows what happened instead of the upload form:
- A summary line reads either "Imported n properties (created created, updated updated)" (or "Imported 1 property (…)" for a single row), or "No properties were imported" if nothing succeeded. If any rows had problems, it also adds "— n problems below" (or "1 problem below").
- A table lists every problem row with its Row number (matching the row number in your spreadsheet or the position in your JSON array), the Field it was on, and the Problem — the exact reason that value was rejected.
- If your file had columns that don't match any property field, a line below the table reads "Ignored unrecognized columns: …" listing them. The rest of the row still imported.
- Click Done to close the dialog.
How updates work
- A row with a Client Property ID that already exists on the account updates that property instead of creating a new one; a row with a Client Property ID that isn't already on the account, or no Client Property ID at all, always creates a new property.
- Updating a property this way replaces all of its fields with what's on the row. A blank cell, or a column that is missing from the file altogether, clears that field on the existing property rather than leaving the old value in place. A blank Status is set back to Available, and blank For Sale and For Lease are set to no. Any Additional details the property picked up from form submissions are removed as well. To change a few values safely, start from a fresh Export, which carries every current value, and edit that.
- If a property with that Client Property ID was deleted earlier, the import brings it back with the values on the row.
- Because a row with no Client Property ID always creates a new property, re-importing the same file twice without Client Property ID values filled in creates duplicates rather than updating the properties you already imported.
Export properties
- Click Export to download
properties-export-YYYY-MM-DD.csv. - The export always includes every property on the account — it ignores whatever search term, status filter, or view you currently have open.
- The file has one column per property field, using the same labels as the import template, so you can open it in a spreadsheet, edit values (or add new rows), and re-import it. Only rows that already have a Client Property ID update the matching property on re-import; edited rows without one create new properties instead.
What happens next
- Rows that came in with an address but no coordinates get their coordinates looked up in the background. There's a short delay before a newly imported property with an address shows up correctly on the map view.
- The properties list refreshes automatically once the import finishes, so new and updated properties appear without reloading the page.
Common questions
Q: I re-imported my export after editing it and now I have duplicate properties — what happened? A: A row without a Client Property ID always creates a new property, it never matches an existing one by name or address. If your export didn't have Client Property ID values filled in (or you added new rows without one), re-importing it created new properties rather than updating the ones already there. Fill in Client Property ID for any row you want to update before re-importing.
Q: Why did some of my properties come back with fields cleared out after I re-imported? A: An import row replaces every field on the property it matches. It doesn't merge with what's already there. Blank cells, and columns your file left out, cleared those values. Start from a fresh export, which carries every current value, when you only want to change a few.
Q: Some of my columns didn't come through — why? A: Check the "Ignored unrecognized columns" line in the import results. A column header has to match one of the property fields (the same labels used in the template) to be recognized; anything else is skipped and listed there instead of failing the import.
Q: Can I import a very large file? A: Each import handles up to 1,000 rows; a longer file is refused with "Imports support at most 1000 rows per file" and nothing is imported. Split it into files of 1,000 rows or fewer and import them one at a time.
Related
Last updated on