Build a form: fields, pages, and rules
Add and configure fields from the palette, organize them into pages, set up conditional rules, map fields to your CRM for autofill, and let autosave keep your changes in sync.
Before you start
- You need a form already created — from Forms, open an existing form, or see Create a form to start a new one. Opening or creating a form takes you to this builder.
- The builder has three tabs at the top: Builder, Settings, and Publish. This page covers the Builder tab plus the rules section of Settings; publishing is covered in Publish and share a form.
Steps
Add a field from the palette
The left panel lists Pages at the top and, below a divider, the palette split into Field Groups and Fields. Click any entry to add it to the current page.
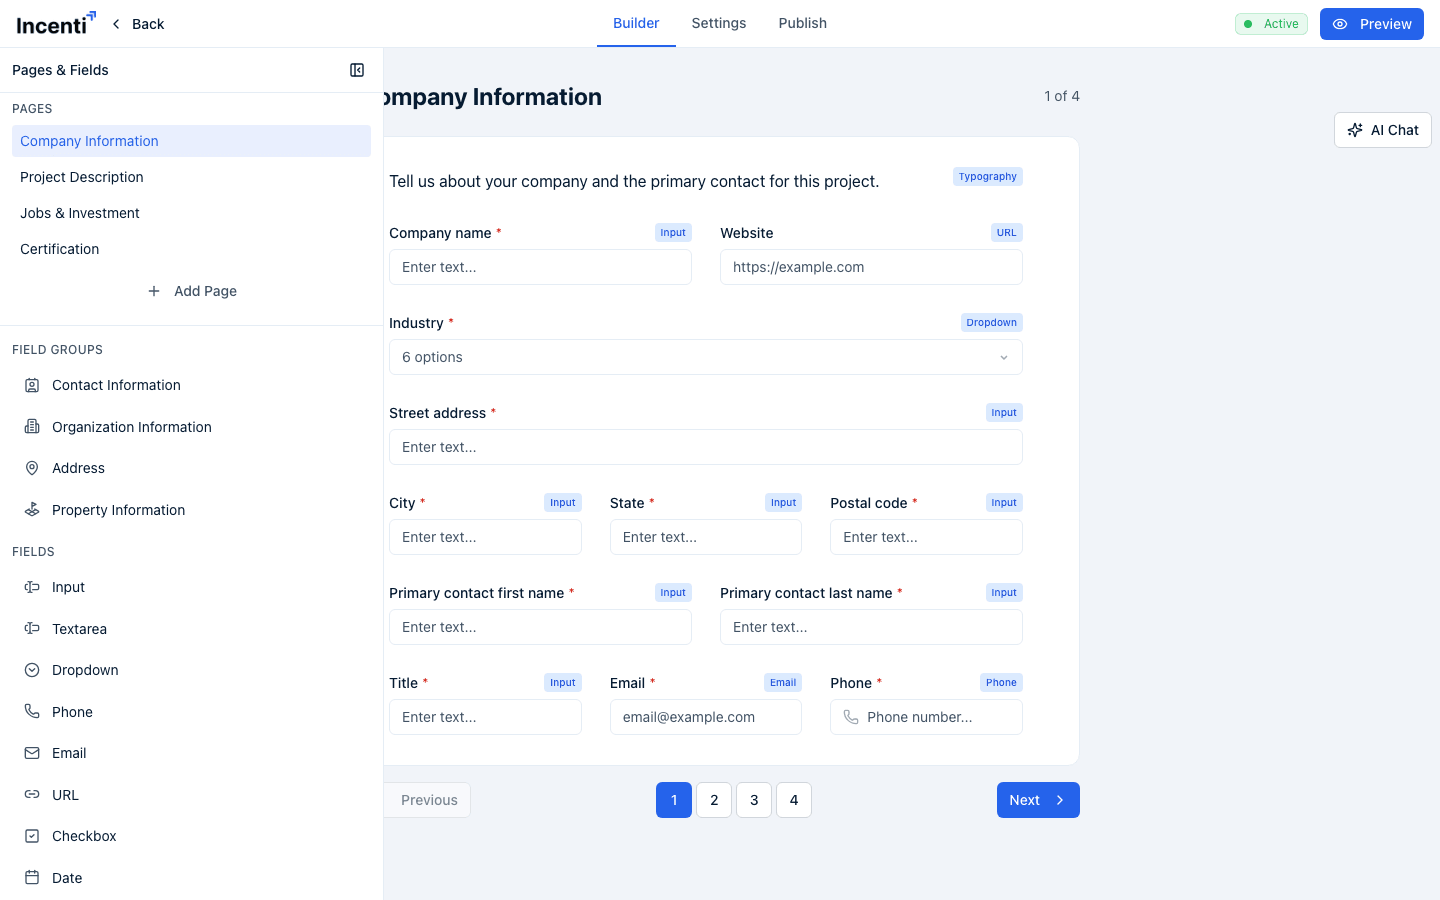
Field Groups — multi-field blocks that also connect answers to your CRM:
- Contact Information — First Name, Last Name, Email, Phone
- Organization Information — Organization Name, Website, Industries
- Address — Street Address, Apt/Suite, City, State, ZIP / Postal Code, Country
- Property Information — only enabled on a multi-page form that doesn't already have property pages or a Property Information group; adding it opens a separate setup dialog before anything is inserted
Adding most groups opens a small dialog asking where the answers should be saved (for example, whether a Contact Information group is the main point of contact or an additional one) — you can also choose not to save the group to your CRM. You can change this choice later from the group's own settings.
Fields — single-question fields, added directly with no dialog:
Input, Textarea, Dropdown, Phone, Email, URL, Checkbox, Date, Typography, Signature, Table, Formula, Upload, Industries.
Reorder fields and pages
Hover a field row to reveal a grip handle on its right edge and drag it to reorder within the page. In the Pages list, hover a page to reveal up/down arrow buttons that swap it with its neighbor, and a trash icon to delete it (only shown when the form has more than one page).
Configure a field
Click a field on the canvas to open Field Details in the left panel. What you can set depends on the field type, but most fields share:
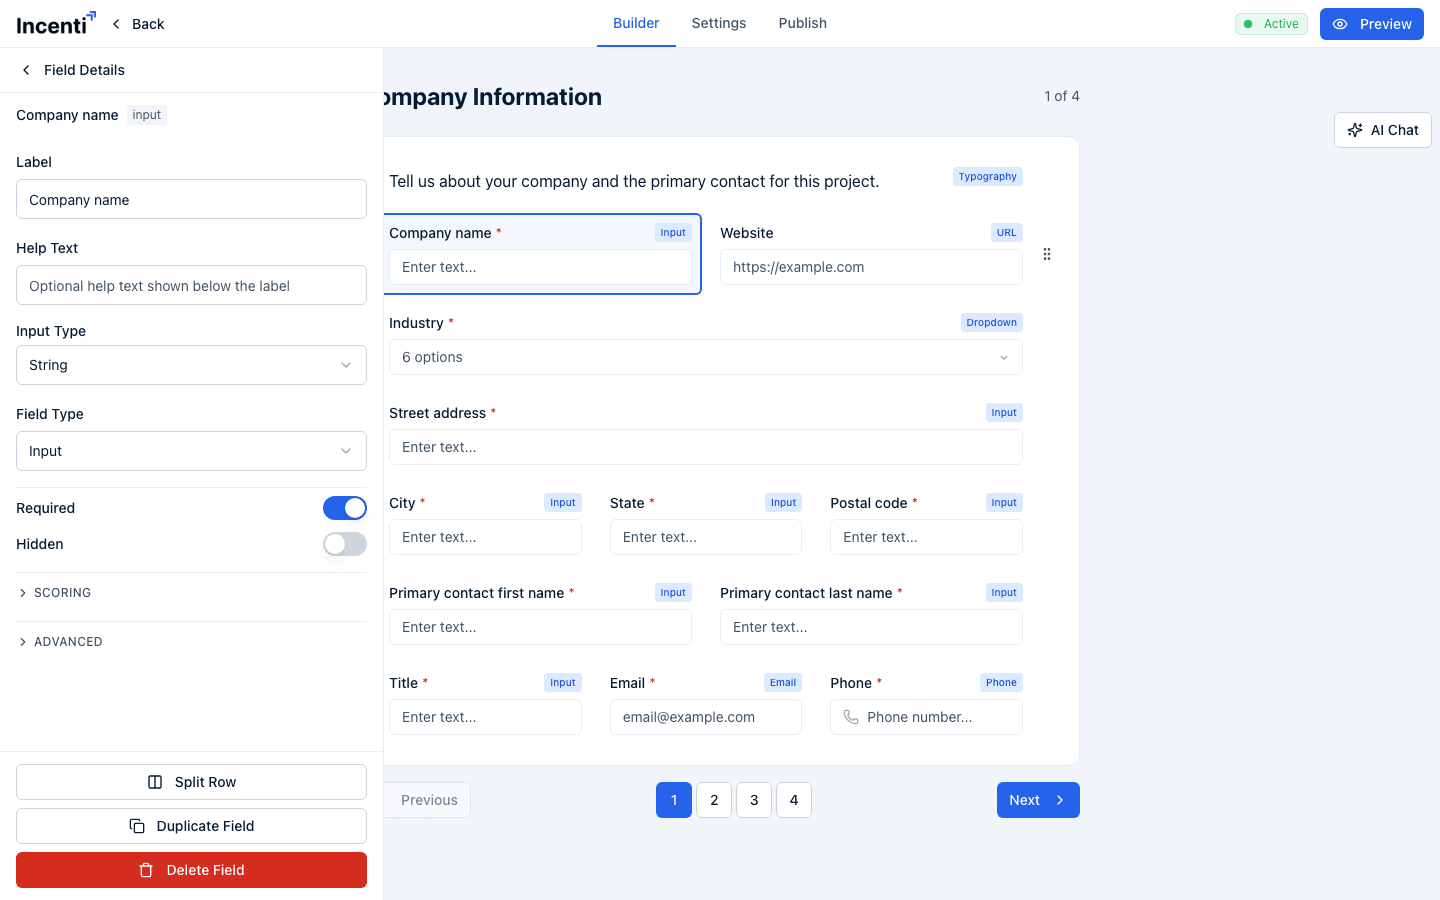
- Label — the question text shown to respondents (not shown for Typography fields, which show a Content editor instead)
- Help Text — optional text shown below the label
- A type-specific Advanced options block matching the field (choices for Dropdown/Checkbox, columns for Table, the formula editor for Formula, and so on)
- Field Type — a dropdown to switch the field to a different type, keeping the label, help text, and required setting. This is disabled for fields that belong to the property pages, since their type is set by the property catalog or the page flow itself.
- Required and Hidden toggles
- Multiselect (Dropdown and Checkbox fields with options)
- Capture Date & Time and Show Date (Signature fields only)
Map a field for autofill (Advanced options)
Expanding Advanced on a field shows its Key (the field's internal identifier) and an Auto Populate control. For an ungrouped field, this is a two-step dropdown: pick an entity, then pick the specific value on that entity to map to — mapped fields can be filled in automatically for respondents and synced to your CRM on submission. A field that's part of a mapped field group shows its mapping here as read-only, with a note that it's "Managed by the group's CRM auto-save setting" — change it from the group's settings instead of here.
Add pages
Click Add Page at the bottom of the Pages list to insert a new page after the one you're viewing. Respondents move between pages with Previous and Next. Two switches on the Settings tab change how pages are shown: Table of Contents adds a navigable list of pages for respondents, and Single Page Mode shows the whole form on one screen instead of paginating. Single Page Mode is unavailable while the form has property pages.
Set up conditional rules
On the Settings tab, the rules section defines conditional logic that shows, hides, enables, disables, sets, or clears the value or options of a field based on another field's answer. Click Add Rule to open the rule editor, where you choose the triggering field and condition and the resulting action; existing rules are listed with a plain-language summary (for example, "When "State" equals "Yes" → Show "Follow-up question""), and you can drag them to reorder, or use the edit and delete icons on each one. If the form includes Property Information pages, some rules are created and managed automatically to reveal or hide those pages — these don't appear in this list, and a note tells you how many are hidden this way.
Save your work
There's no separate save button — the builder autosaves shortly after you stop editing. The header shows Saving… while a save is in progress, or Unsaved changes when edits haven't been saved yet.
What happens next
- Autosave writes your changes in the background; you can navigate between the builder's tabs and pages without losing work.
- Fields mapped to a CRM entity, or added through a Field Group with CRM auto-save turned on, create or update the matching contact, organization, address, or property records automatically when someone submits the form.
Common questions
Q: Do I need to click Save before I close the builder? A: No. The builder autosaves automatically a short time after you stop typing or making changes. Watch for Saving… to finish, or check that the Unsaved changes message is gone, before you navigate away.
Q: Why is the Field Type dropdown disabled for one of my fields? A: That field belongs to the Property Information pages — its type is either set by the property catalog or managed by the page flow itself, so it can't be switched from the field editor.
Q: What's the difference between a Field Group and a regular Field? A: A Field Group adds several related fields at once (like a full Address) and can optionally save the respondent's answers to a contact, organization, address, or property record in your CRM. A regular Field is a single question with no CRM connection unless you map it manually in Advanced options.
Q: Can I show or hide a field based on someone's answer to another question? A: Yes, using conditional rules. Add a rule that checks a condition on one field and shows, hides, enables, disables, or updates another field when that condition is met.
Related
Last updated on