Create a form
Start a new form from scratch, from a template, or by uploading an existing document, and name it before moving to the builder.
Before you start
- You need access to the Forms area of the portal.
- If you plan to start from a template, know roughly what the form is for (BRE survey, RFI, incentive application, etc.) so you can find a matching category.
- If you plan to upload a document, have the file ready. Accepted types are
PDF, Word (.docx), Excel (.xlsx, .xls), CSV, or ODS, and it must be under
25MB. Legacy
.docfiles are not supported — re-save as.docxfirst.
Steps
-
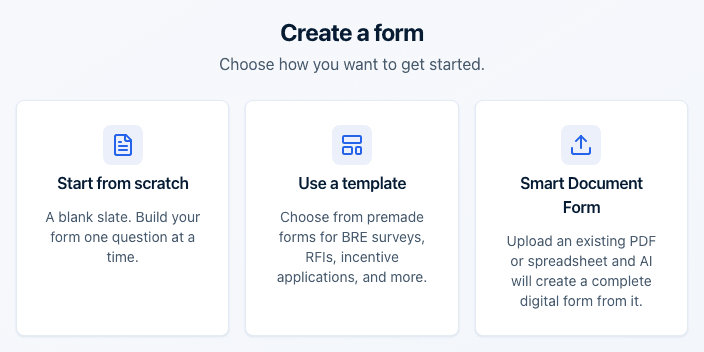
Open Forms and select Add Form. The new-form screen asks Choose how you want to get started.
-
Pick one of the three starting points:
- Start from scratch — "A blank slate. Build your form one question at a time."
- Use a template — "Choose from premade forms for BRE surveys, RFIs, incentive applications, and more."
- Smart Document Form — "Upload an existing PDF or spreadsheet and AI will create a complete digital form from it."
-
If you chose Start from scratch, you're taken straight to the Form Details screen (step 6).
-
If you chose Use a template, you land on a template browser:
- Use the category list on the left (built from your form types, each showing a count) or the All Templates option to filter.
- Use the Search templates... box to filter by name.
- Hover a template card to see Preview (opens the template in a new tab) and Use Template. Each card also shows its field count and page count.
- Click Use Template to continue to Form Details.
-
If you chose Smart Document Form, you land on an upload screen:
- Drag a file onto the drop zone, or click Choose file to browse ("Drag & drop your file here" / "or click to browse files").
- Click Scan form. The button shows "Uploading..." then "Scanning..." while it works — this can take a few minutes.
- When the scan finishes you'll see "Document Processed Successfully," the file name and size, and how many fields were detected, followed by a Field Breakdown list by field type.
- Click Upload Different File to start over, or Continue to move to Form Details with the detected fields already in place.
-
On Form Details, give your form a Title (required) and, optionally, a Description. Choose a Type from the dropdown, or leave it as Other if none fit. If you started from a template, the type is set for you and the dropdown is disabled.
-
Click Create Form. You're taken straight into the form builder to continue setting it up.
What happens next
- Your form is created immediately with the status Draft. It does not accept responses until you activate it from the builder's Publish tab.
- If you started from a template, the new form is a full copy of that template's fields and pages, ready to edit independently.
- If you started from a document scan, the fields, options, and pages the scan detected are pre-built in the form body; you land in the builder to review and adjust them before activating the form.
Common questions
Q: What file types can I upload for the Smart Document Form option?
A: PDF, Word (.docx), Excel (.xlsx or .xls), CSV, or ODS spreadsheets, up to
25MB. Older .doc files aren't supported — save the file as .docx first.
Q: Can I change the form type after I've created the form? A: No. The type is fixed when you create the form, and a form started from a template takes the template's type. The builder's Settings tab lets you change the name and description, but not the type, so create a new form if you need a different type.
Q: My document scan is taking a long time — did it fail? A: A scan can take a few minutes. If you leave the page mid-scan and come back, the upload screen picks the scan back up automatically ("Resuming your previous scan..."). If something does go wrong, you'll see an error message and can try again.
Q: Is the Smart Document Form the same as uploading a document to an existing response? A: No — this is a separate feature for creating a brand-new form from a document. Filling out a document tied to a specific response is a different flow, started from the Responses area.
Related
Last updated on